
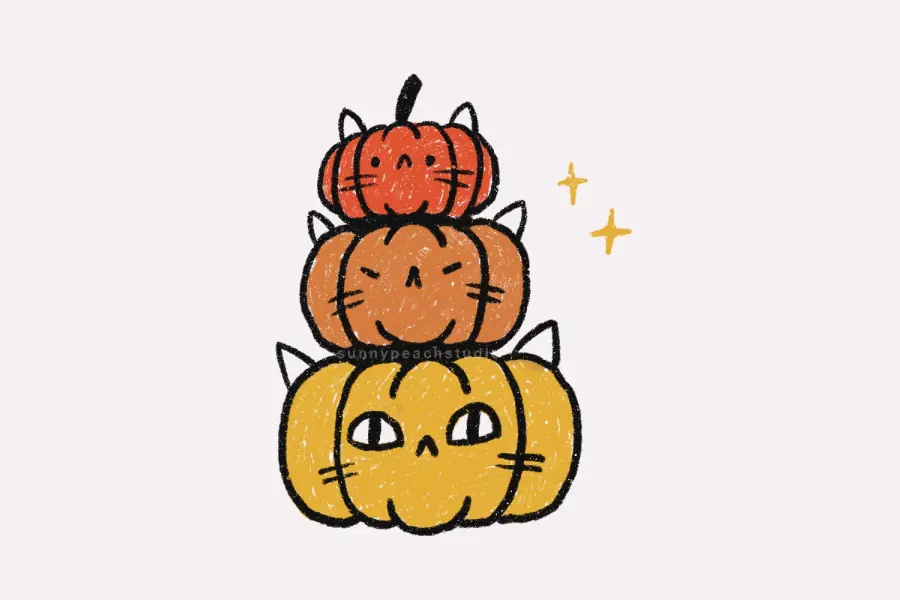
Stacked pumpkins are such a fun little fall drawing, and they’re much easier to draw than they might look.
In this tutorial, I’ll show you how to build a stack of three pumpkins one simple shape at a time. You can keep your pumpkins simple and classic, or add little cat ears and faces to turn them into a cute stack of pumpkin cats.
Grab a pencil or drawing tool and let’s get started!
How to Draw a Stack of Pumpkins
Step 1: Start with a simple curved shape
Begin by drawing two small curved lines with a little space between them.
These will become the center section of your first pumpkin.

Step 2: Add the sides
Draw a rounded curve on each side of the center shape.
Try not to worry about making everything perfectly even. Pumpkins look especially cute when the shapes are a little different from one another.
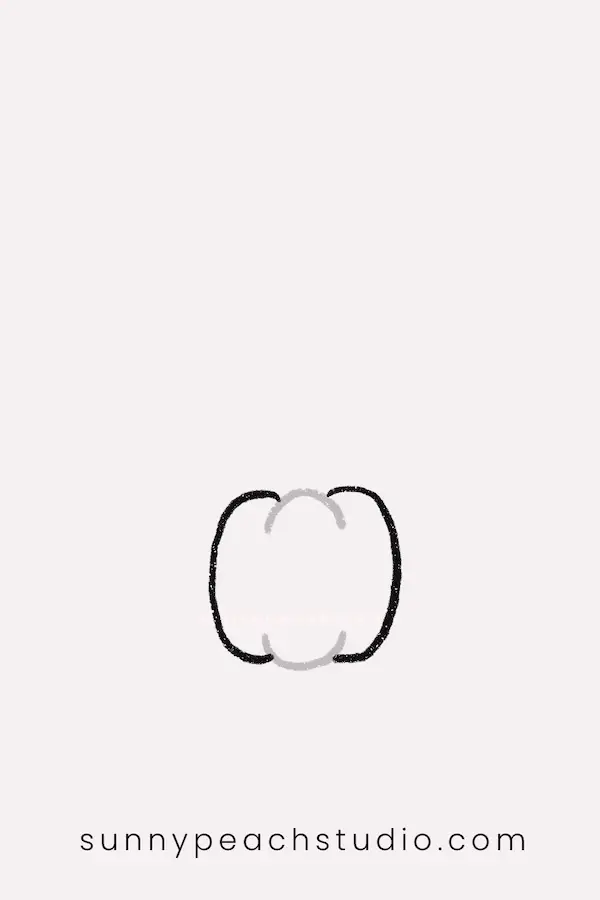
Step 3: Finish the first pumpkin
Add another rounded section on each side.
Now you should have a simple pumpkin shape made from several soft, curved sections.
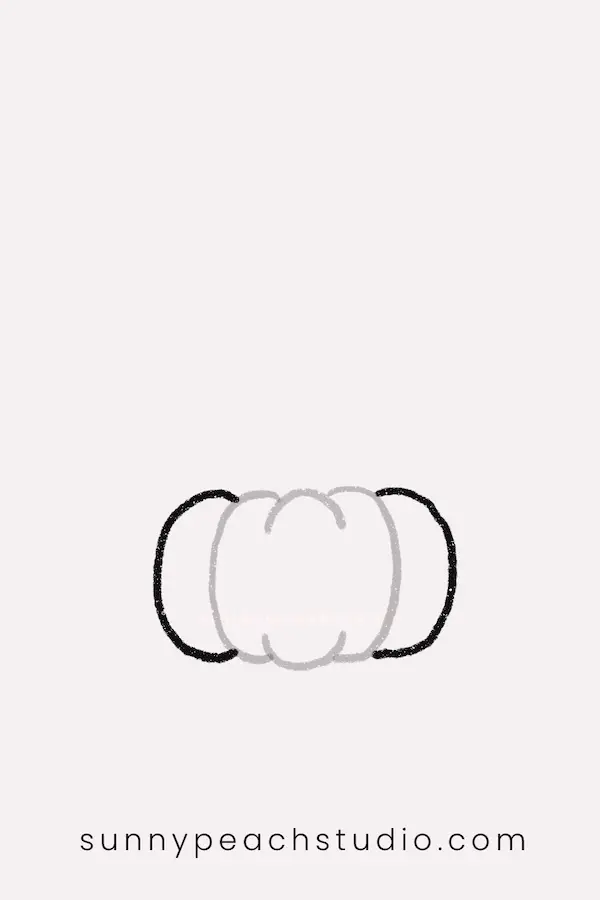
Step 4: Add the second pumpkin
Draw a smaller pumpkin sitting on top of the first one.
I like to make the pumpkins slightly different sizes because it gives the stack a more playful look.
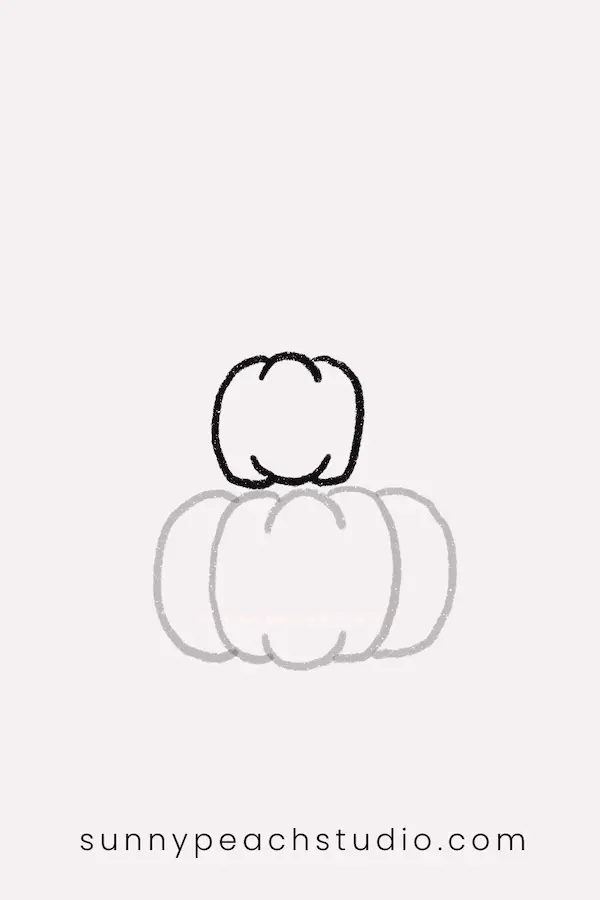
Step 5: Start the top pumpkin
Add the center shape for one more pumpkin above the second one.
Keep this pumpkin a little smaller than the others.
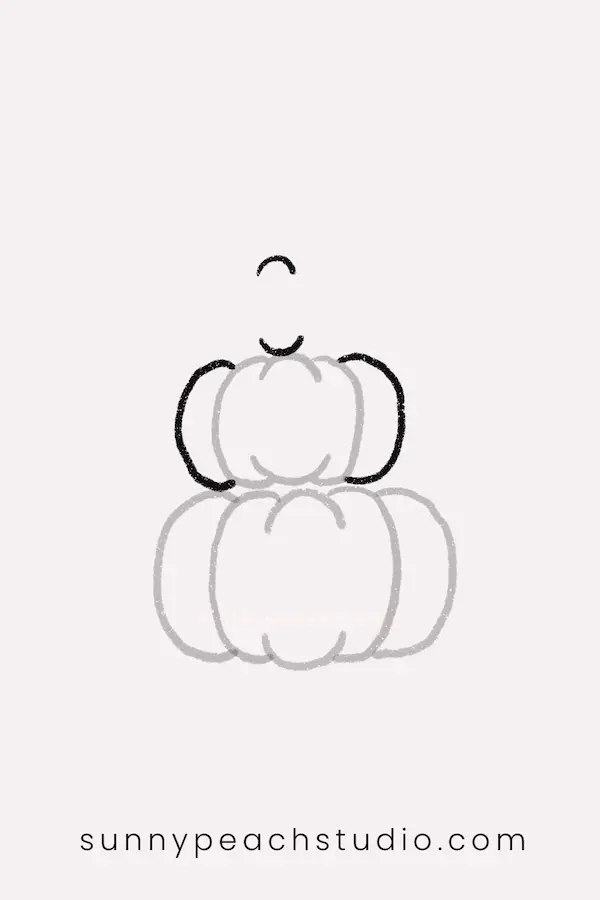
Step 6: Complete the pumpkin stack
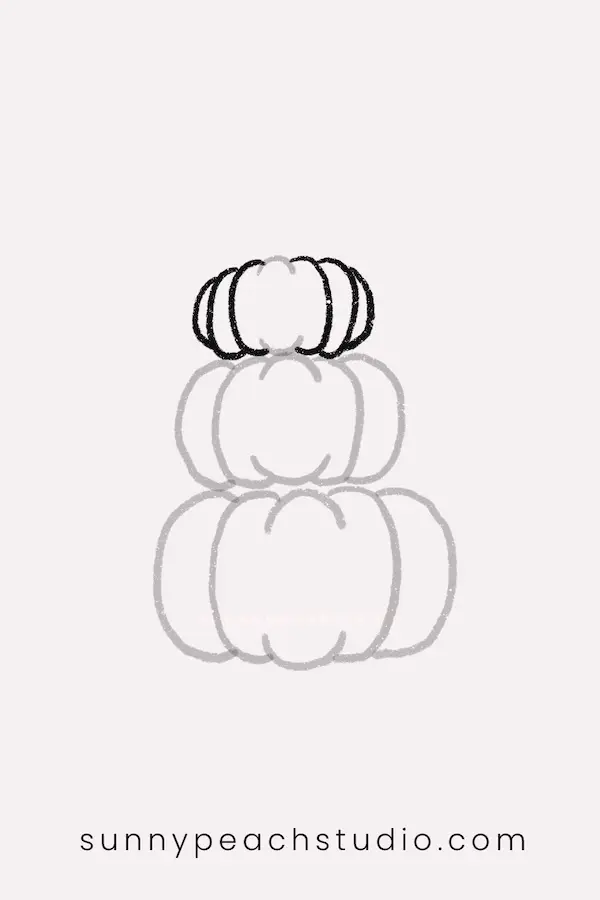
Finish the curved sides of the top pumpkin.
You now have three pumpkins stacked on top of one another.
At this point, you could add a stem and stop here for a simple stacked pumpkin drawing.
Turn Your Pumpkins Into Cats
Here’s where we can make the drawing a little more fun.
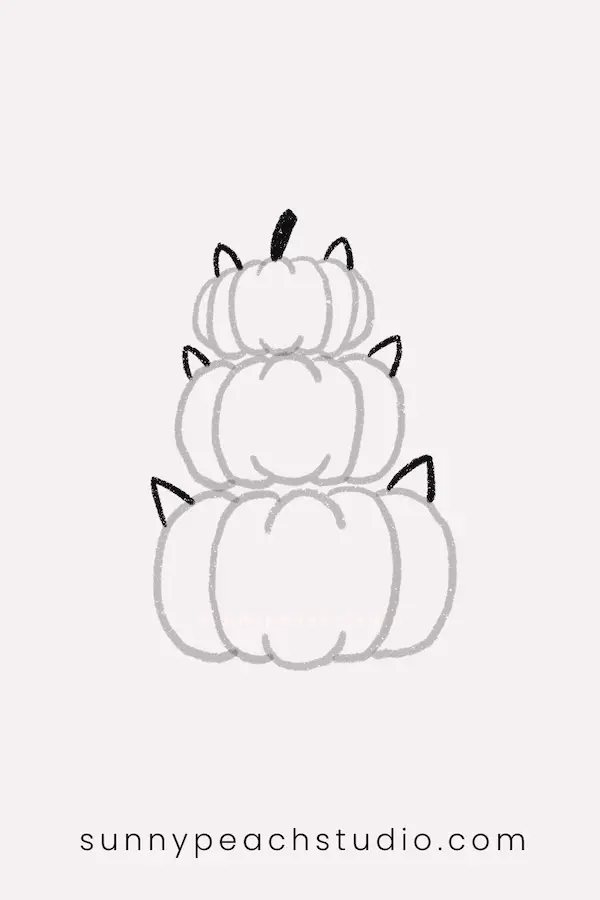
Step 7: Add cat ears
Draw two small triangle ears on each pumpkin.
Add a stem to the pumpkin at the very top.
Just these few little details already make the pumpkins start to look like cats.
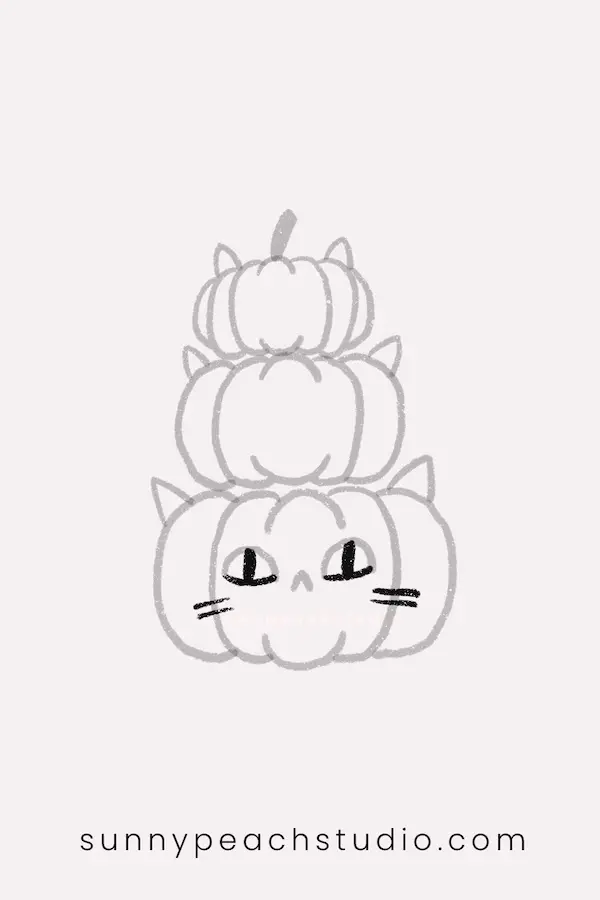
Step 8: Draw the first face
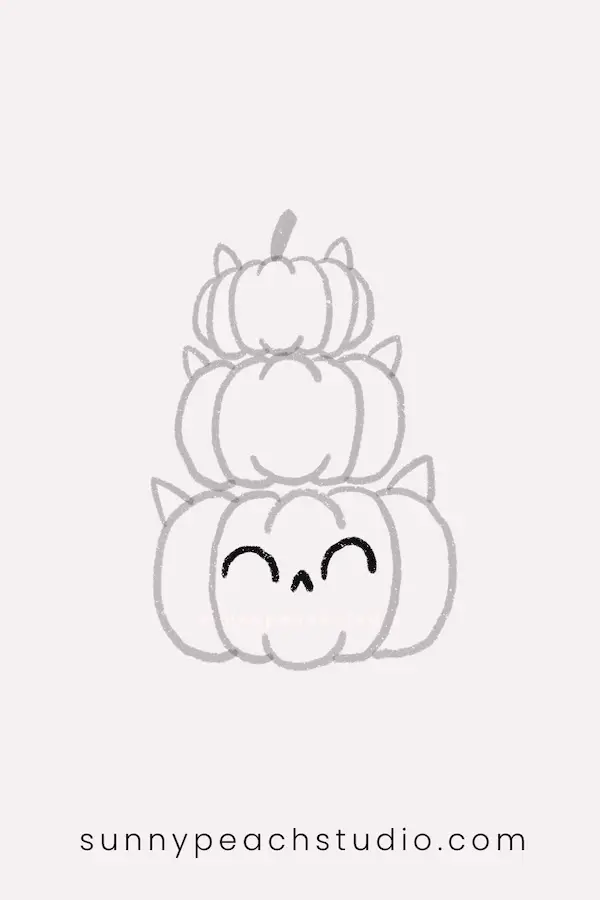
Add a simple face to the bottom pumpkin.
You can use curved eyes for a sweet, sleepy expression, along with a tiny nose.
Step 9: Add more facial details
Try another expression by drawing open cat eyes and a few whiskers.
There’s no need for every pumpkin to have the same face.
In fact, giving each one a different expression makes the finished stack much more interesting.
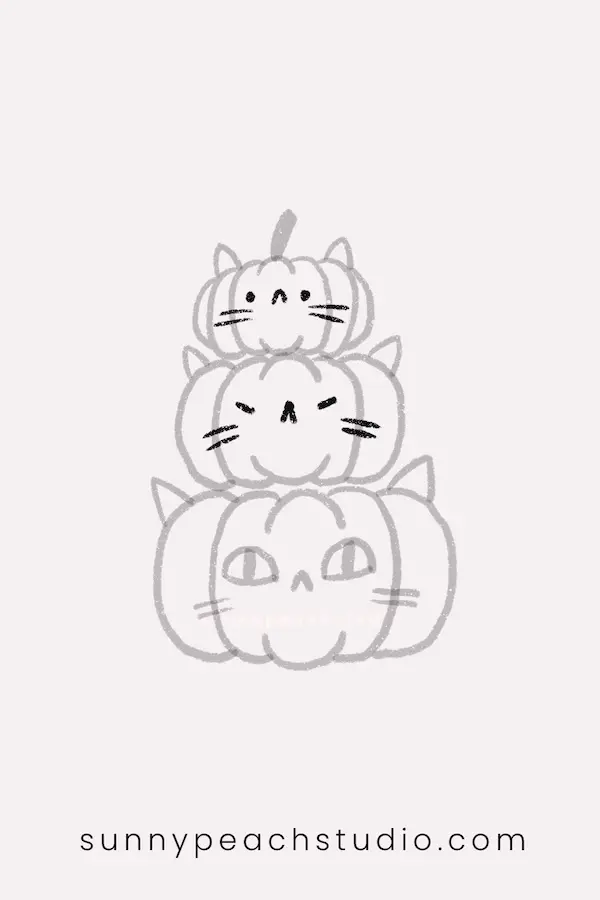
Step 10: Finish all three faces
Add faces and whiskers to the remaining pumpkins.
You can make one happy, one sleepy, and one a little grumpy—or create your own expressions.
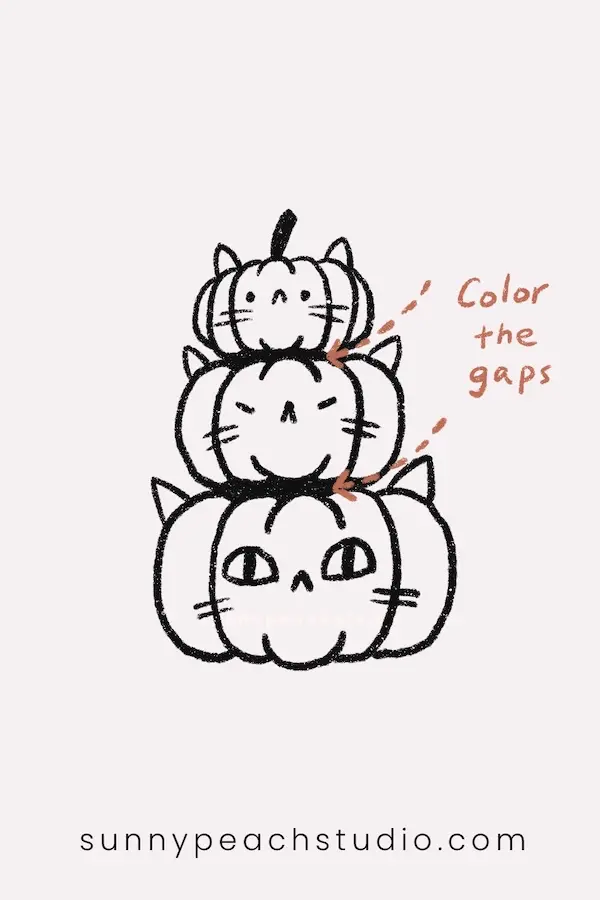
Step 11: Color the gaps
Before coloring the pumpkins, fill in the small spaces where the pumpkins overlap.
This helps separate each pumpkin and makes the stacked shapes easier to see.
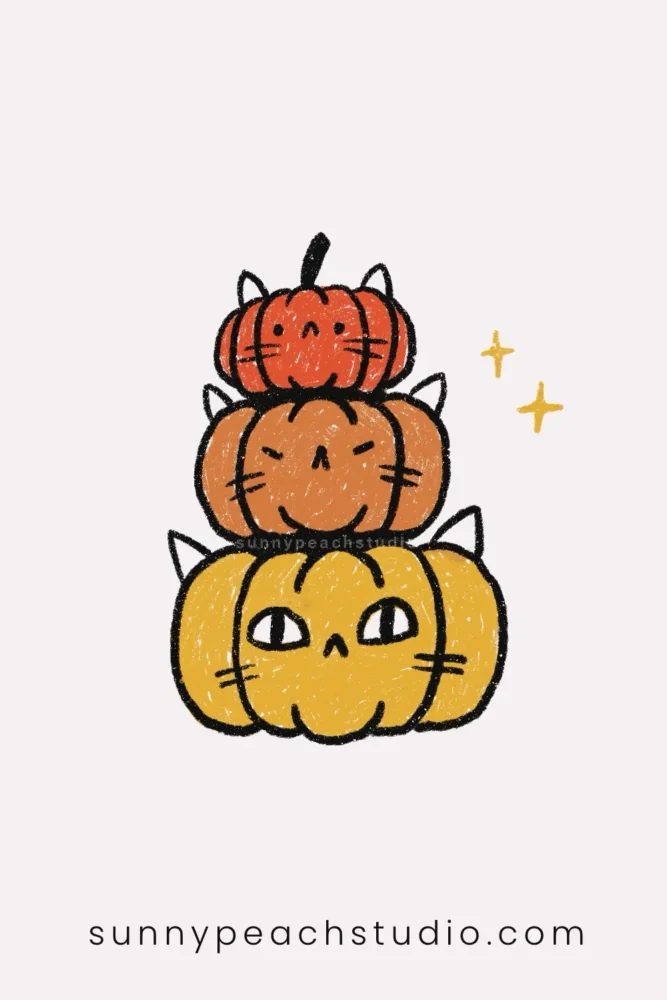
Step 12: Add color
Finish your drawing with your favorite fall colors.
I used orange, warm brown, and golden yellow for my pumpkin cats, but you can use any colors you like.
You could also try soft pinks, greens, creams, or even make each pumpkin a completely different color.
A Simple Stacked Pumpkin Version
If you’d rather keep things simple, you can skip the cat ears and whiskers altogether.
Draw the same three-pumpkin stack, add a few tiny faces, and finish with a stem on top.
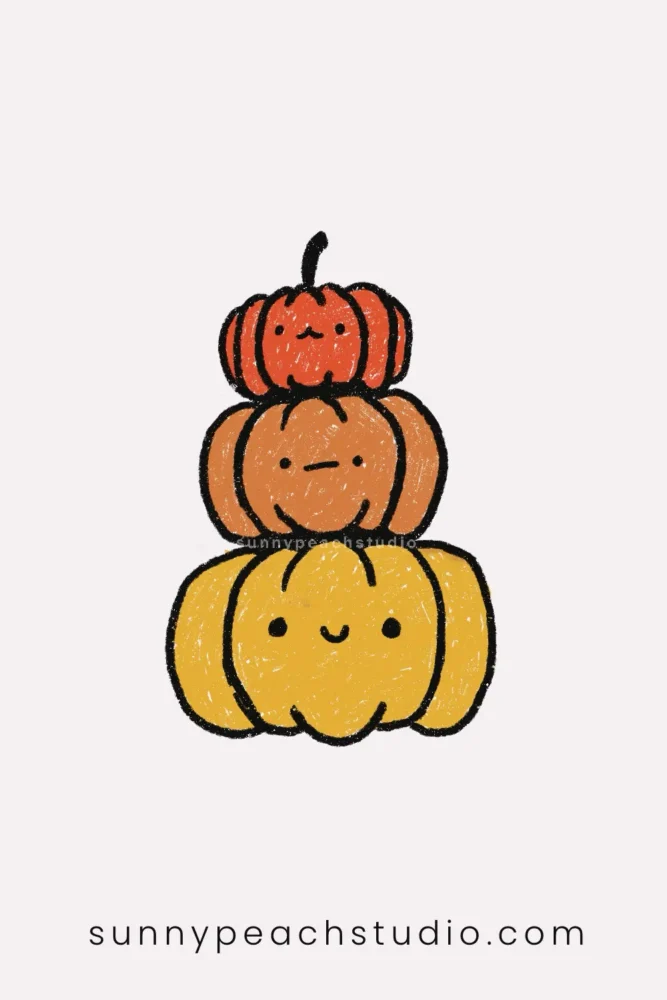
This version is especially nice if you want a more traditional fall drawing while still keeping it cute and playful.
Make It Your Own
There are lots of little ways you can change this drawing.
Try adding leaves around the pumpkins, drawing a tiny bow on one of the cats, changing their expressions, or stacking pumpkins in different sizes.
You could even draw four or five pumpkins if you want an extra-tall stack.
Most of all, have fun with it. Your pumpkins don’t have to look exactly like mine.
More Easy Drawing Ideas
If you enjoyed this tutorial, you might also like my 12 Cozy & Easy Fall Drawing Ideas for more simple things to draw this season.
And if you love cute animal drawings, take a look at my 12 Cute & Easy Cat Drawing Ideas for more inspiration.
Happy drawing! ♡
Leave a Reply